 The Shooting Chrony
is a chronograph that measures the speed of bullets, arrows, shotgun & airgun pellets, paintballs,
etc., from 30/fps. to 7000/fps. and with better than 99.5% accuracy.
The Shooting Chrony
is a chronograph that measures the speed of bullets, arrows, shotgun & airgun pellets, paintballs,
etc., from 30/fps. to 7000/fps. and with better than 99.5% accuracy. The Shooting Chrony
is a chronograph that measures the speed of bullets, arrows, shotgun & airgun pellets, paintballs,
etc., from 30/fps. to 7000/fps. and with better than 99.5% accuracy.
The Chrony is actually a very simple device consisting primarily of two photo sensors located in each of the black plastic housings at the front and back of the main unit. They are located under the Twin Lenses at the bottom of these housings and they detect the passage of a bullet over them by sensing the change in the amount of light (i.e., the bullet casts a shadow over the photo sensor).
As the bullet passes over the first detector, it trips a counter, which begins to count very rapidly (much as a super-fast stop watch). The counter is shut off by the second photo sensor when the bullet passes over it. The computer in the Chrony then converts this information into either feet per second or meters per second.
The Chrony I have is the very basic F-1 model which measures in feet per second and has just the simple display which shows bullet velocity. Though it is very simple and hard to mess up, I quickly realized that there are three issues that you must pay attention to if you want to get reliable results from this chronograph.
The area where I shoot is just too shady for the Chrony to work reliably (at all really). My primary purpose in buying the Chrony was to test a couple of loads at the start of a "production run." To accomplish this, the plan was to take a couple of newly loaded rounds out in the woods behind my house and test the velocities using the Chrony. Trouble is, it's all woods back there, no clearing at all. Therefore the Chrony has been useless to me in that environment. That is, until now.
For less than $20, I built a light kit that will work in any lighting condition; even in rain. Here are the materials I rounded up for this project:
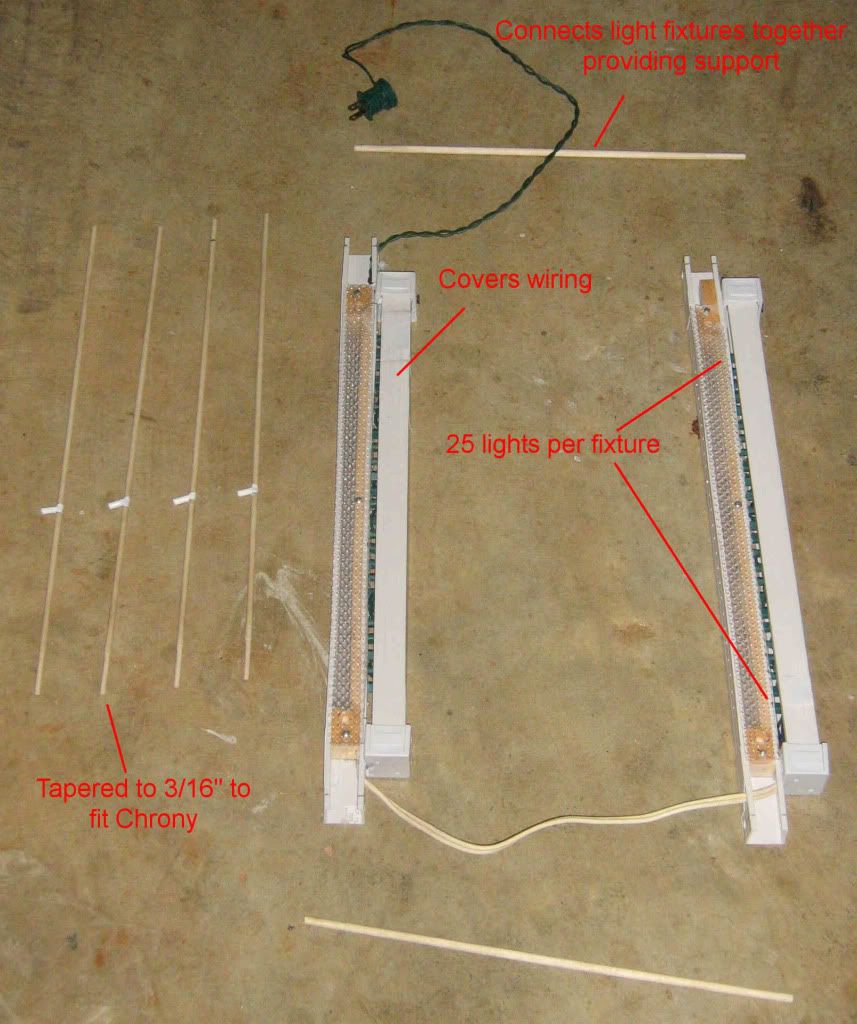
After calculating the length the light fixtures needed to be, I ended up drilling 25 holes in the sides of the mini-blind housing and mounting 25 Christmas lights and then covering over all the wiring with another mini-blind housing. This provides a very rugged unit that can withstand some fairly rough treatment. I drilled holes in the ends of the fixtures so the 1/2" dowels can fit in so that it gives the whole light assembly some structure and stability. I added little "sights" to the four vertical rods to make aiming my shots a little easier.
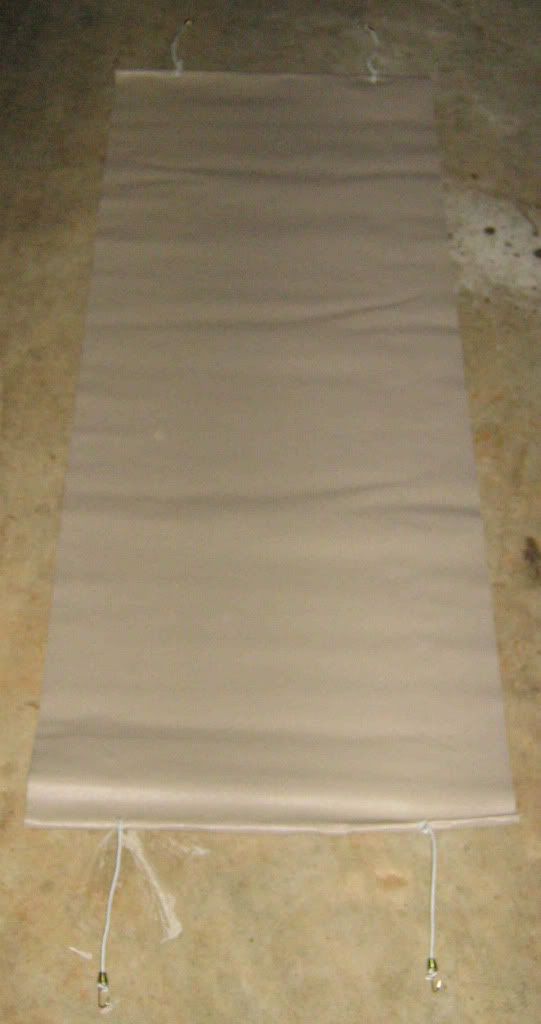
I glued and rolled up a couple of dowel rods on the ends of the roll of kitchen drawer liner material and attached bungee cords so the wind won't blow the cover around when I lay it over the lights.
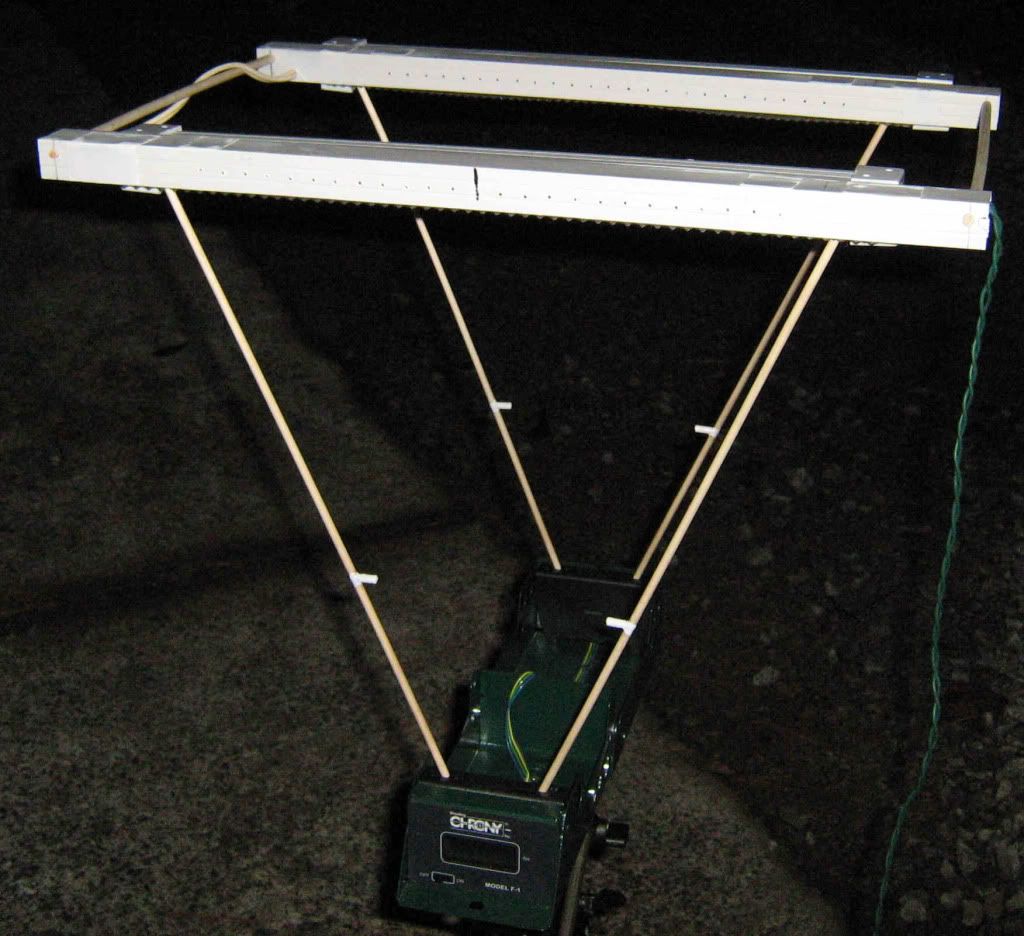
Here is the light fixture assembly with the support dowel rods in place. Each light fixture houses 25 Christmas lights. Notice the diffusers which I cut from the fluorescent light panels.
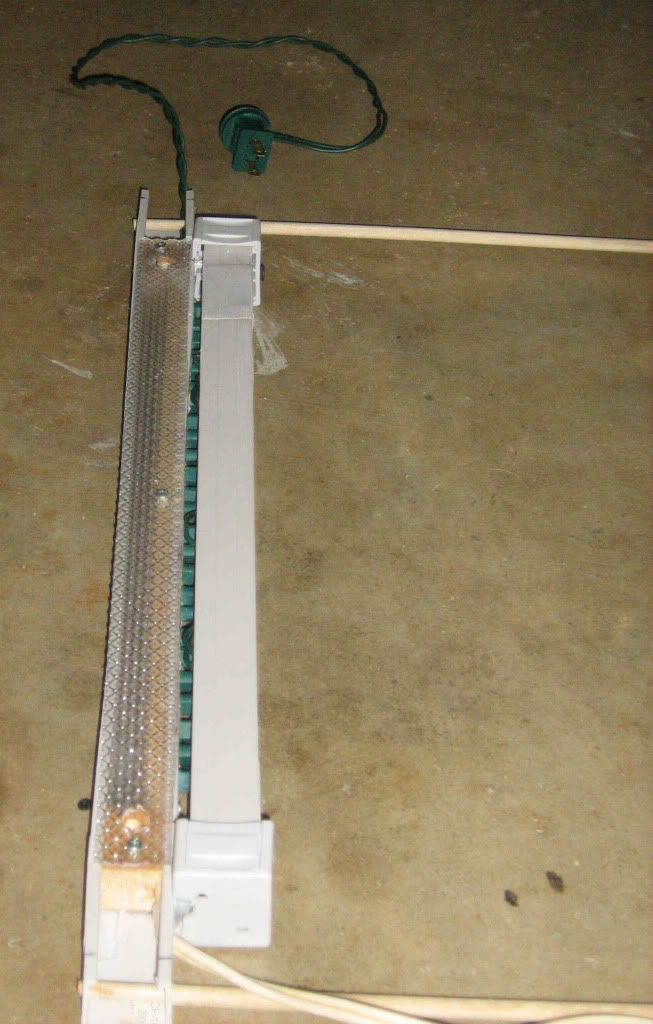
I cut the mini-blind upper housing in two pieces and drilled 25 holes to mount the lights in the one and used the other half as a conduit to hide and protect the wiring. Notice the holes on the ends where the vertical rods mount to the Chrony.
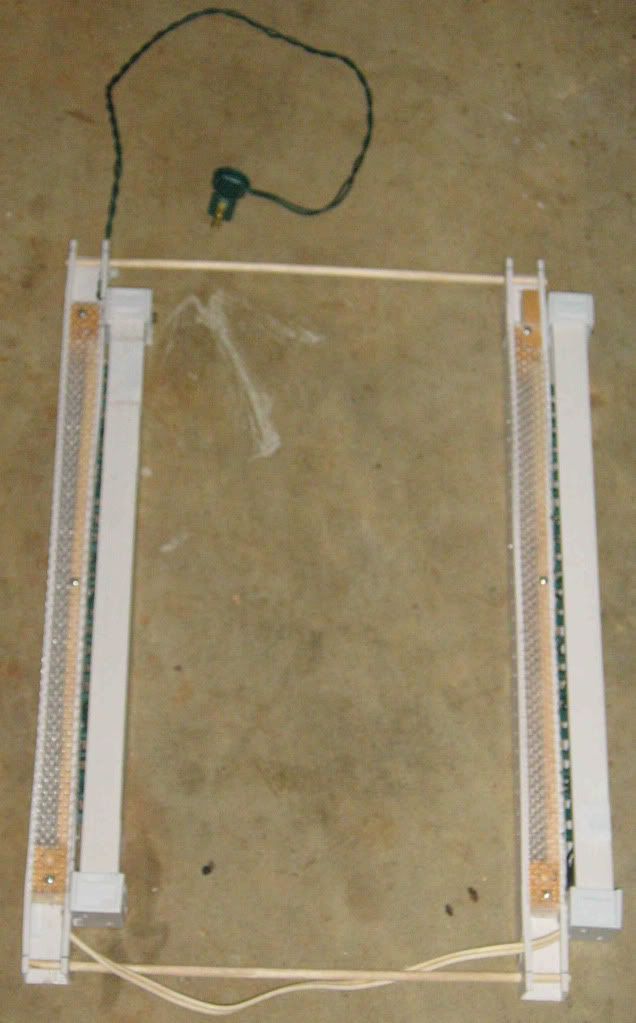
The light kit mounted in place. The four little "sights" are exactly 5" above the sensors and provide very easy sighting such that you're firing straight over the sensors and not at an angle. I am very pleased with how well this "sighting" works.
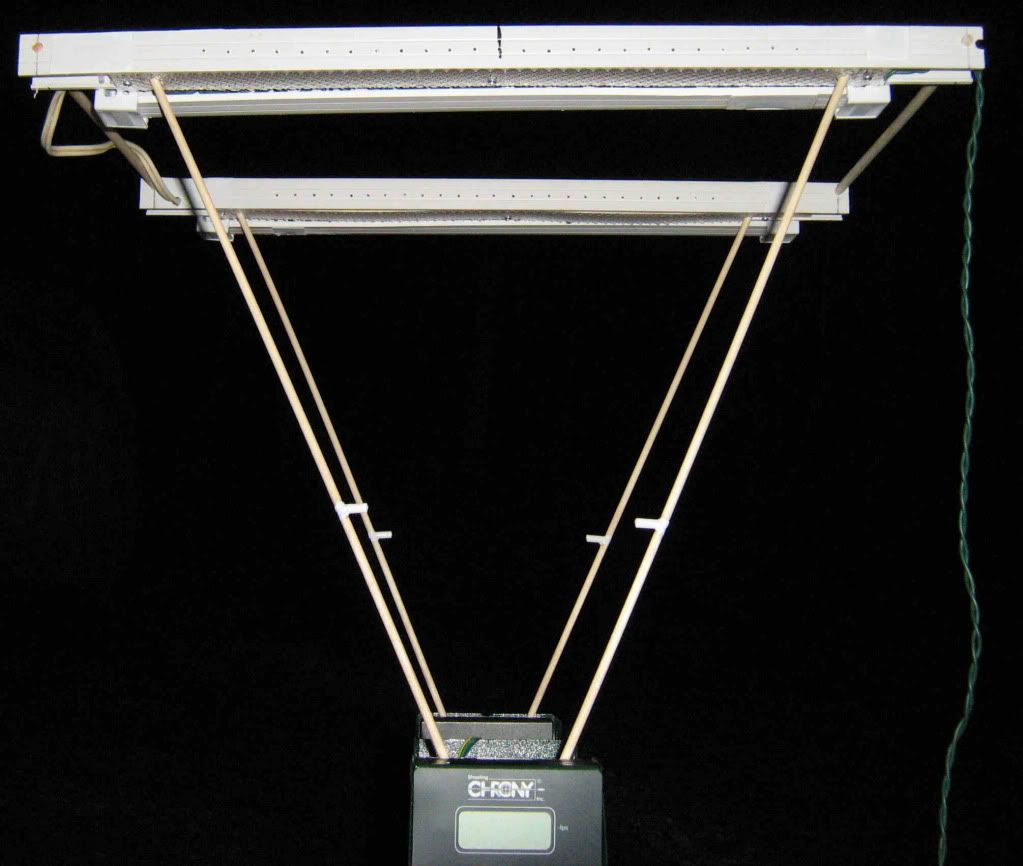
Another view showing the "sighting."
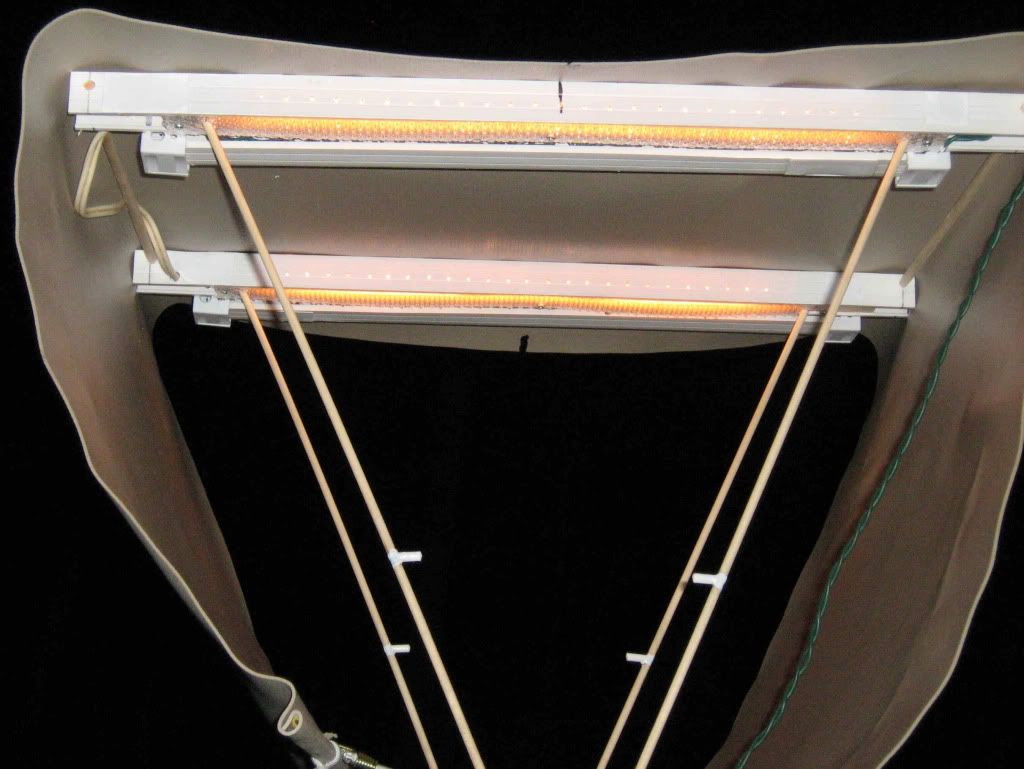
With the "shroud" in place. This should allow the lights to work even if it is a bright sunny day or on a rainy day.
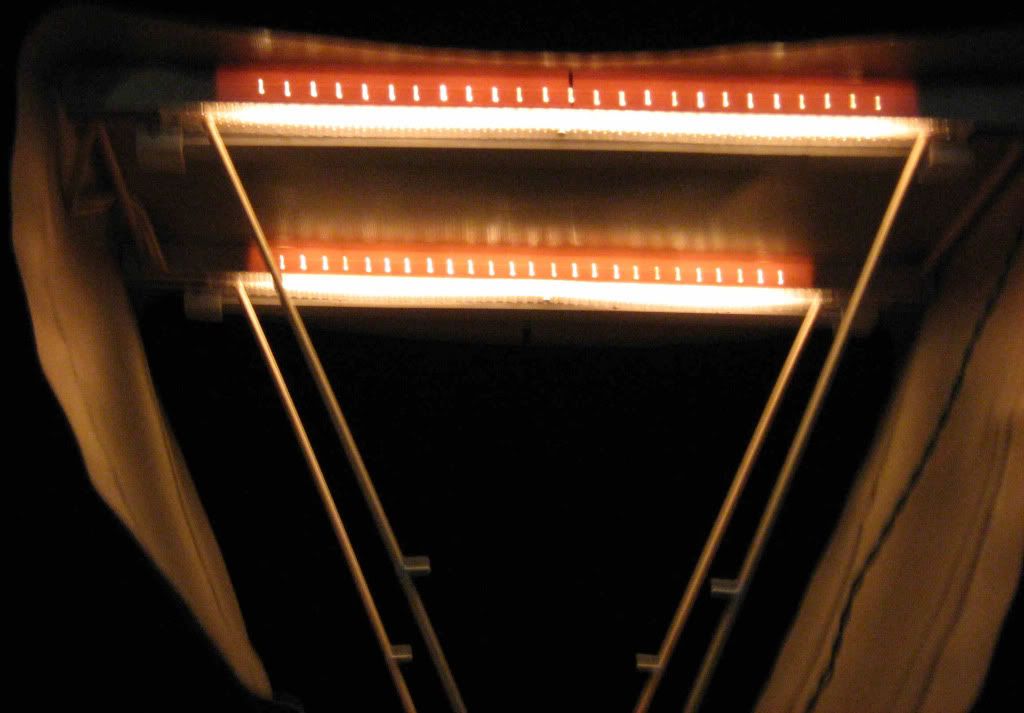
No flash showing the amount of light produced. Seems to work very well.
The biggest limitation with this is, of course, you need an electrical outlet near by. This was no problem for me as where I set it up is not far from an outlet on the back of the house.