The trigger on the real F-16 Falcon is a dual-stage spring loaded lever which starts a film recorder when you pull to the first stage and then fires the nose cannon when you pull the trigger all the way.Ā This mod emulates that behavior very nicely except, of course, the function of the two stages are completely programmable so that you can do whatever you want with the two stages.Ā
The ConceptĀ
Ā
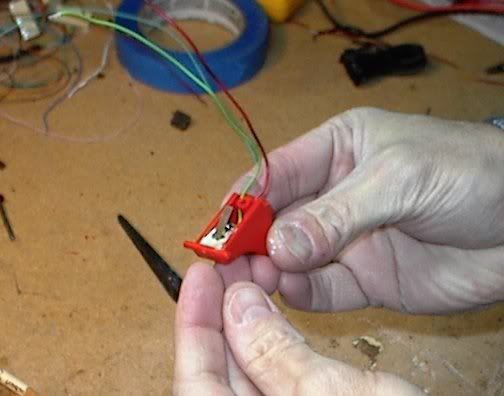
Most of this mod takes place in the trigger of the CH FighterStick.Ā The only other modification involves adding two wires to the pinky button (B4) and connecting them to the second-stage button.
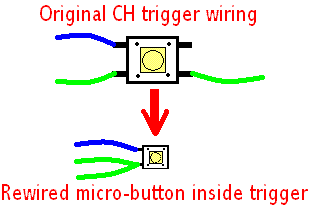
After removing the original
trigger wires and relocating them to the micro-button in the
trigger, you simply solder wires from the pinky button to the (now) secondary
stage trigger button as follows.
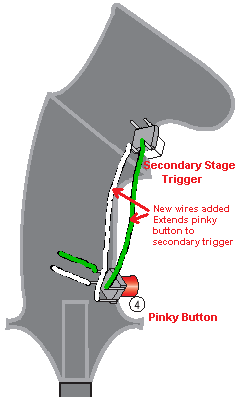
This means, of course, that pressing the pinky button (B4) is exactly the same as pressing the secondary
trigger. However, because of the dual-stage
trigger design, you cannot press the secondary
trigger without the primary
trigger (B1) being held down at the same time. Using script, we can exploit that behavior. Here's how to do that:
Code:
// In the GUI, assign a CMS button to be the action you want the
// secondary trigger to perform.  For example:
// CMS.B1  <=  Fire_All_Guns

%DEFINE Primary_Trigger    JS1.B1
%DEFINE Secondary_Trigger  CMS.B1
%DEFINE Pinky_Button       JS1.B4

Secondary_Trigger = ( Primary_Trigger AND Pinky_Button);
Since the Pinky button and the secondary
trigger button are electrically the same button, our script can tell the difference between the pinky button being pressed by itself and when it's pressed in concert with the primary
trigger (B1). The other nice side effect of this arrangement is if you don't want to use the
dual stage trigger for a particular game, you simply don't include a script to handle the secondary
trigger and everything functions as before (except that if you pull the
trigger all the way until the secondary
trigger is pressed, it will be like pressing the pinky button).Ā
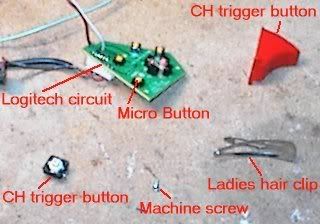
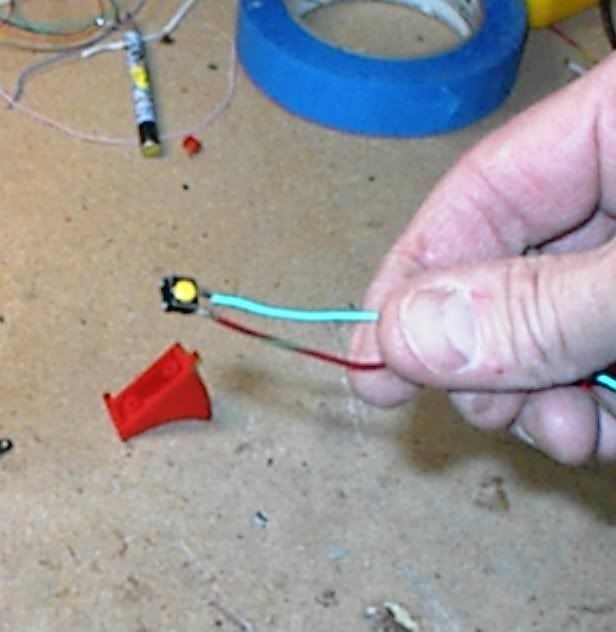
This picture shows the parts you need to complete this project. I pulled the micro-button out of a Logitech circuit I had laying around. My daughter donated the hair clip.
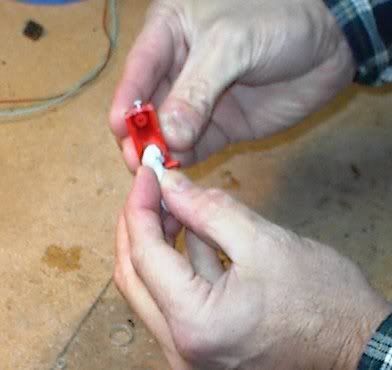
First, solder two wires to the micro-button.
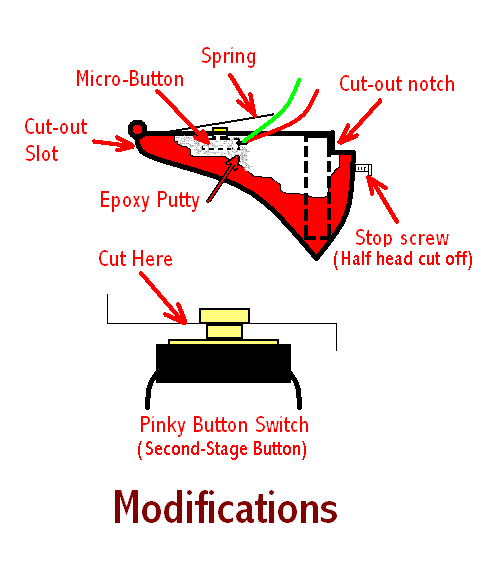
The rear internal post of the
trigger must be removed to make room for the installation of the micro-button.
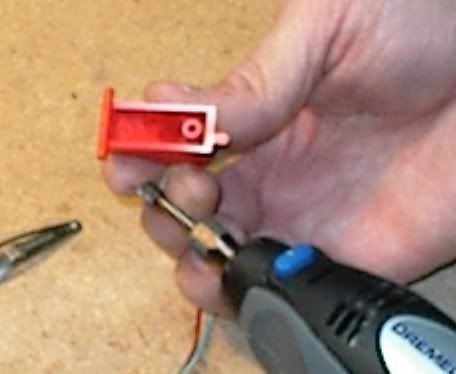
Now we have to cut a notch away in the back of the
trigger to allow it to pass the stop correctly inside the FighterStick so the second
stage button can be reached.
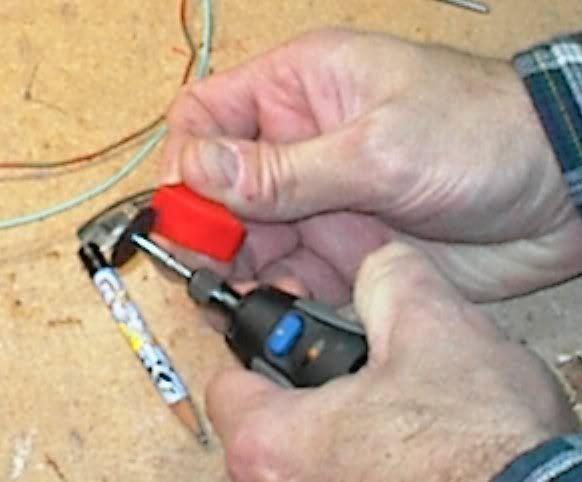
A slot is cut on the hinge end of the
trigger to make way for the spring which will give the
trigger the tension and movement as well as depressing the first
stage button.
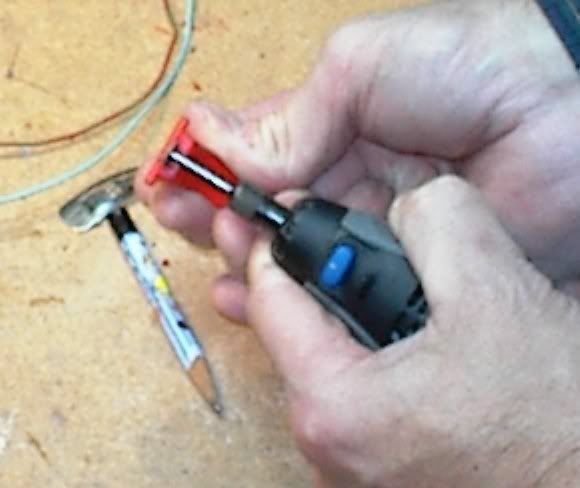
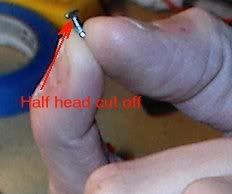
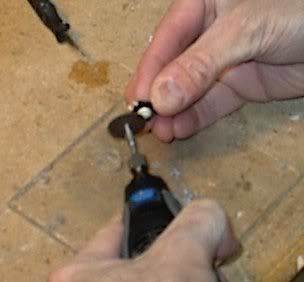
A small machine screw will serve as a stop for the
trigger. The head is cut half way off to provide the proper movement of the
trigger. The screw can be turned slightly to adjust that movement.
The screw is installed at the end of the
trigger and will fit nicely in the crevice of the FigherStick at the bottom of the
trigger.
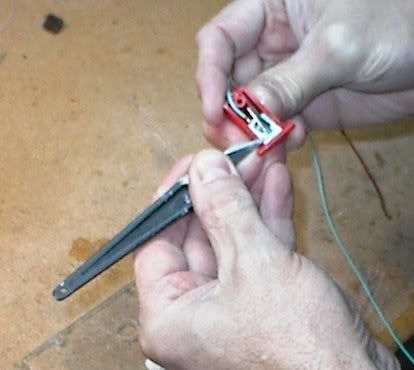
A lady's hair clip provides for the spring that gives the
trigger its tension as well as pressing the primary
trigger button. Here I'm sawing out a 2cm section of it which will be glued into the slot cut out in the hinge end of the
trigger.

----
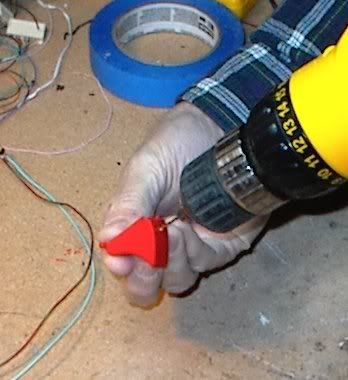
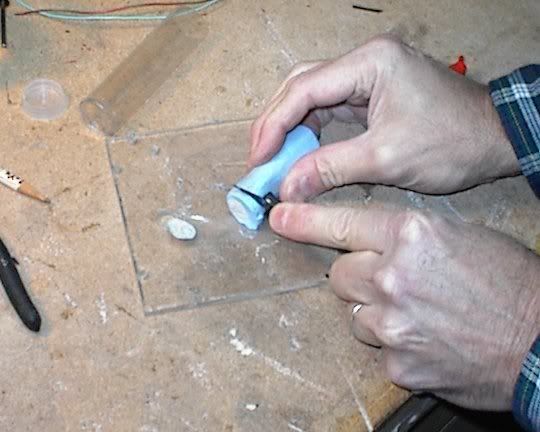
Next, mix up some epoxy putty and mash it down into the
trigger then set the micro-button in the putty leaving just the top portion of the button extending above the surface of the
trigger. The putty will also secure the spring into position.
---
---
---
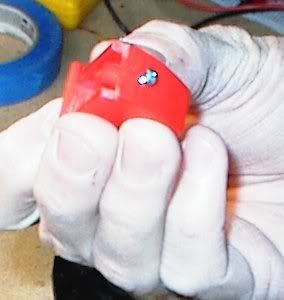
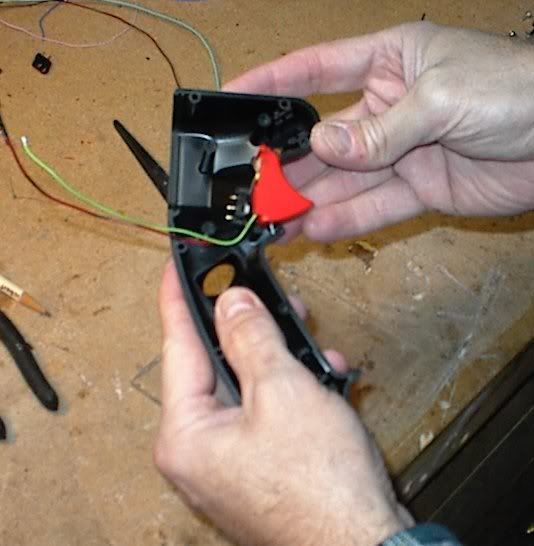
Here is the
trigger after all the mods have been made.
When installing the
trigger, the spring will lock against the mounting bracket for the original
trigger switch (now the secondary
trigger button) and the screw fits neatly between the outer wall of the FighterStick and the stop post.
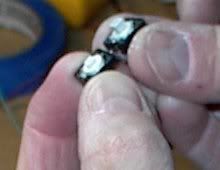
The last mod to do is to trim the pinky button switch down to provide the
trigger the 1/4" of movement it needs in this new configuration.
This picture shows how much of the button is cut away.
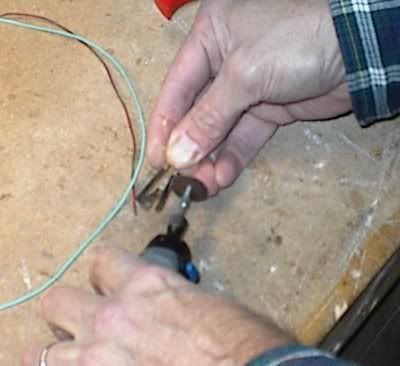
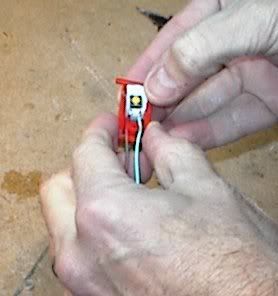
Finally, the wires on the original
trigger switch must be removed and rewired to the micro-button inside the
trigger. The two green wires are soldered to the green wire on the
trigger switch and the blue wire is soldered to the other lead.