by Mark "HomeBoy" Fletcher
Lephturn's very excellent article in the Aces High II Training Corps
web site entitled "Auto-Trim in Aces High" ONLY deals with what I
refer to as "Button Trim." In fact, calling "button trim" "manual
trim" is really confusing because that term implies that it is the only
type. There is another manual trim system used by Aces High that is
not addressed at all. I call this "Analog Trim." Analog trim is
ABSOLUTELY NOT the same thing as Button trim; neither do they work the
same way.
1. Confusing Terminology
Most people use the term "manual trim" to describe what
is really "button" or "digital" trim. That makes the terminology very
confusing. I suspect that is because very few actually use trim axes
and don't realize how different that is from using Button Trim. Button
Trim is the keyboard commands you issue to trim your controls. Analog trim is a term I use when there are potiometers involved (i.e.
dials, wheels, knobs). That is, when you assign an AXIS for trim in
the AH Controllers setup, then you are using Analog Trim rather than
Button Trim. Therefore, "Manual Trim" is actually a generic term which
denotes two methods of manual trim: "Button" and "Analog."
2. Analog and Button Trim interaction
As soon as you set up Analog Trim within AH, the Button Trim commands
begin to behave differently than they did before. For example, with no
Analog Trim assigned, when you go into level autopilot (yellow light),
you can press the left and right rudder trim keyboard commands to trim
your rudder left and right. Each time you press a key, the rudder will
trim in that direction one "notch." The rudder will stay at that
offset until you move it back the other way with the opposite rudder
trim key. When Analog Trim is assigned, the Button Trim keys no longer
work this way. Instead, you have to HOLD the Button Trim key down
until your plane yaws around to your desired heading and when you
release the key, the rudder will recenter. Therefore, if you were to
quickly press a rudder Button Trim key say five times, then nothing
really will happen because the rudder will recenter after each press.
You could sit there pressing the left rudder trim key 500 times and it
would never yaw the plane. This is very confusing until you realize
how Button Trim has changed when you turn on Analog Trim.
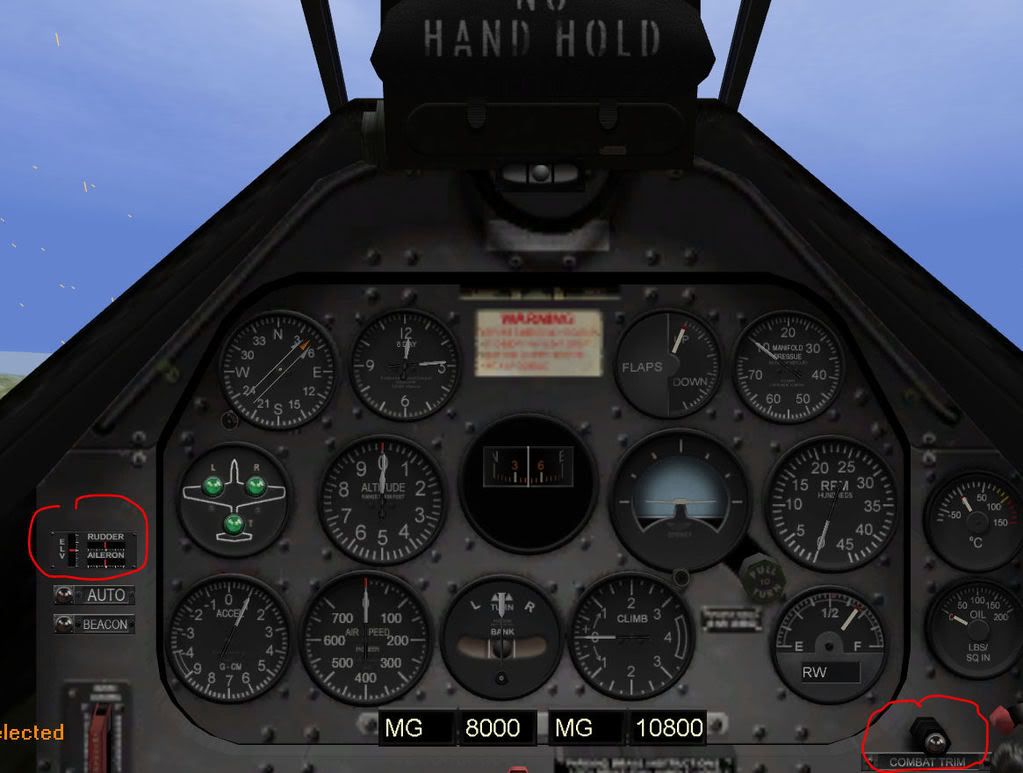
3. Combat Trim becomes your enemy
Combat Trim no longer works the way it did before you go to Analog
Trim. Without Analog Trim, you can enable CT and your plane will
automatically trim up based on what CT "understands" needs to happen to
trim your plane. As soon as you move a control surface or press a
Button Trim command, CT will disable and leave your plane trimmed the
way CT left it. When Analog Trim is configured however, CT will no
longer disable when you move a control but if you hit a Button Trim
command it will disable. Unlike Button trim however, rather than the
trims staying where CT leaves them, they will move to where you have
your Analog Trim wheels set. That means that you cannot use CT to get
your trims set then switch it off to keep that trim setting the way you
do with Button Trim. At best, you can look at where your trim setting
indicators show your trims to be and then physically moving them there
after CT disables. If you choose to begin using Analog Trim, you will pretty much want to leave Combat Trim behind as it will fight you more than it will help you.
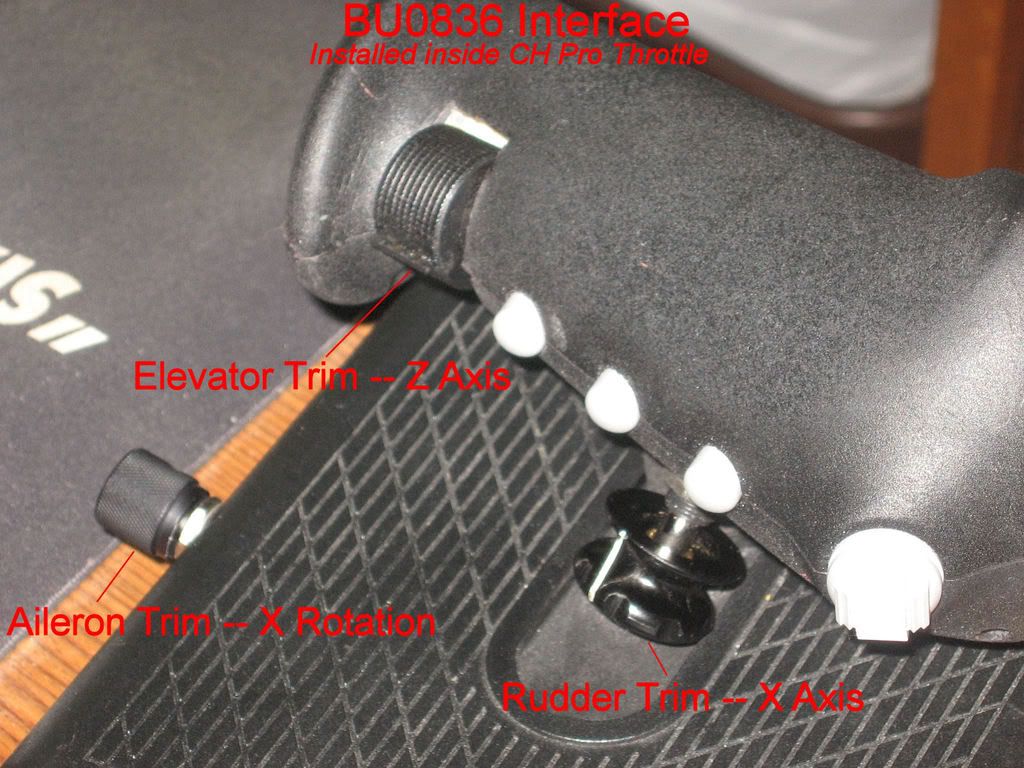
Obviously in order to use Analog Trim in Aces High you must have the proper hardware. This can be as simple as extra dials or knobs on you stick or throttle that you decide to dedicate to rudder, elevator and aileron trim or a dedicated "trim unit" that supplies the three axes needed for trim and mounts on or inside your controllers. Here is an example of using Leo Bodnar's BU0836 Interface controller installed inside a CH Pro Throttle with added knobs for the trim axes.
Once you have your trim hardware installed and it's USB cable plugged into your computer, the first thing you must do is check out the controller from Window's Game Controllers utility.
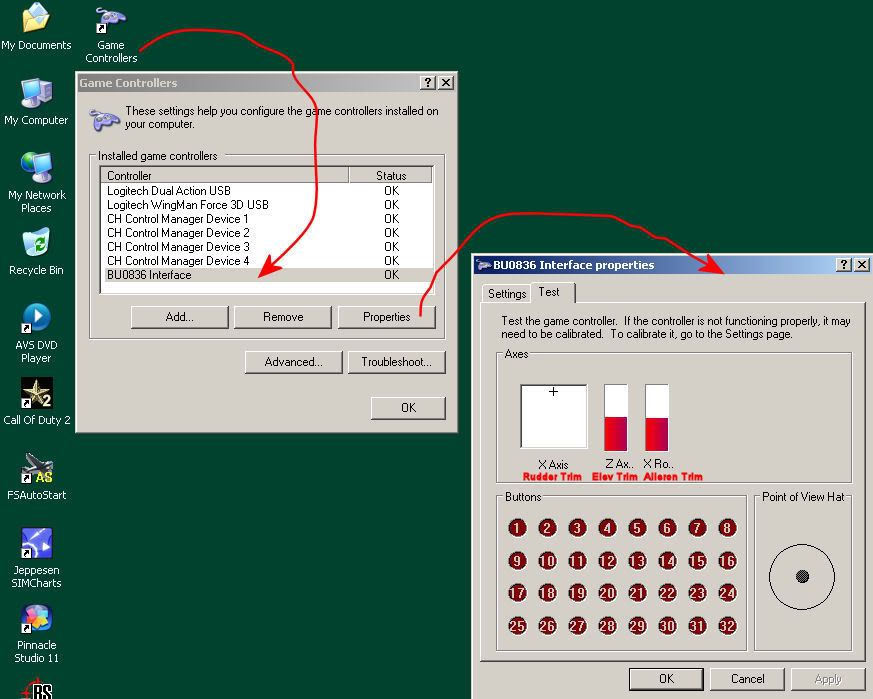
Here, you see the BU0836 controller (inside the PT) and it's three axes used for the three trims.
Once you verify and test each axis, the most important next step is to calibrate the controller from within Game Controllers by clicking the Settings tab and choosing Calibrate. Carefully move each axis and be sure to follow the instructions. When done, your trim wheels should move from extreme to extreme in a steady manner (not jumping around or suddenly moving to one extreme or the other). If you notice erratic behavior, you may need to recalibrate. It is vital that you get the calibration at this level as perfect as you can get it as anything with respect to your controllers that Aces High "sees" is based on what Windows provides it from this calibration.
Once you have your trim unit calibrated and working well at the Windows level, the next step is to configure it in Aces High.
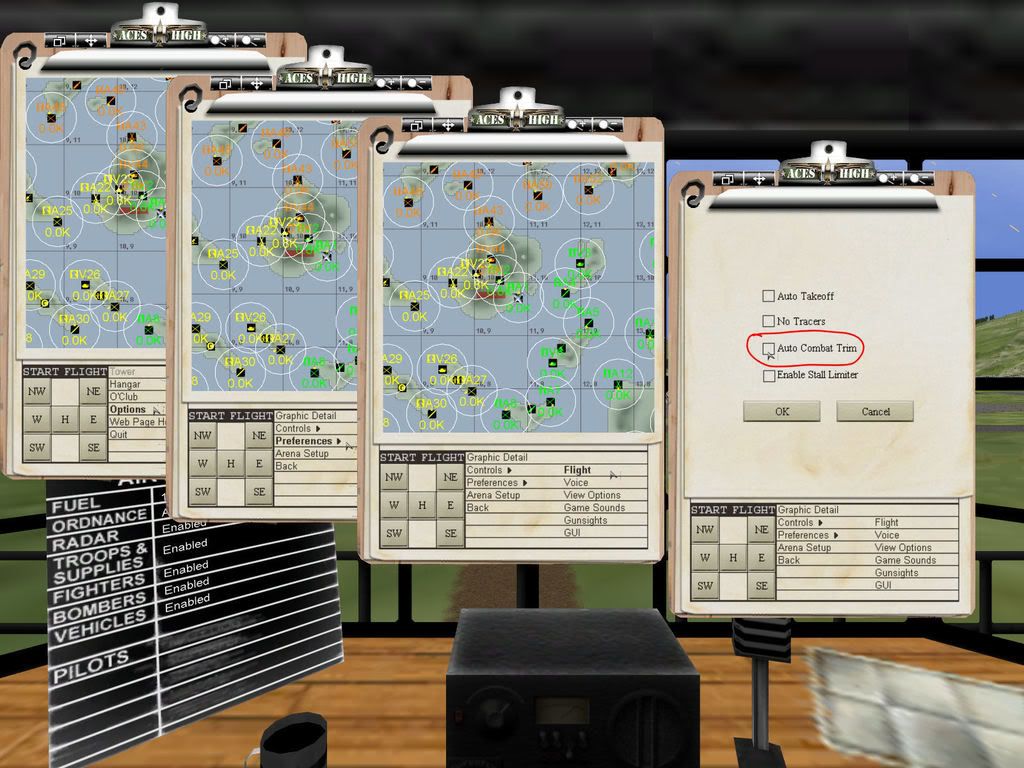
The easiest place to configure your controllers is from Offline Practice. Once you get to the Tower, bring up the Clipboard. The Clipboard is where all the configuration of controllers is done.
One of the important settings when converting to analog trim is to turn off Auto Combat Trim. To accomplish this, click Options, then Preferences, than Flight and deselect the checkbox for Auto Combat Trim:
Next, you will need to tell Aces High about the trim axes you plan to use. To do this, click Options, then Controls. Follow these steps for each of three trim axes:
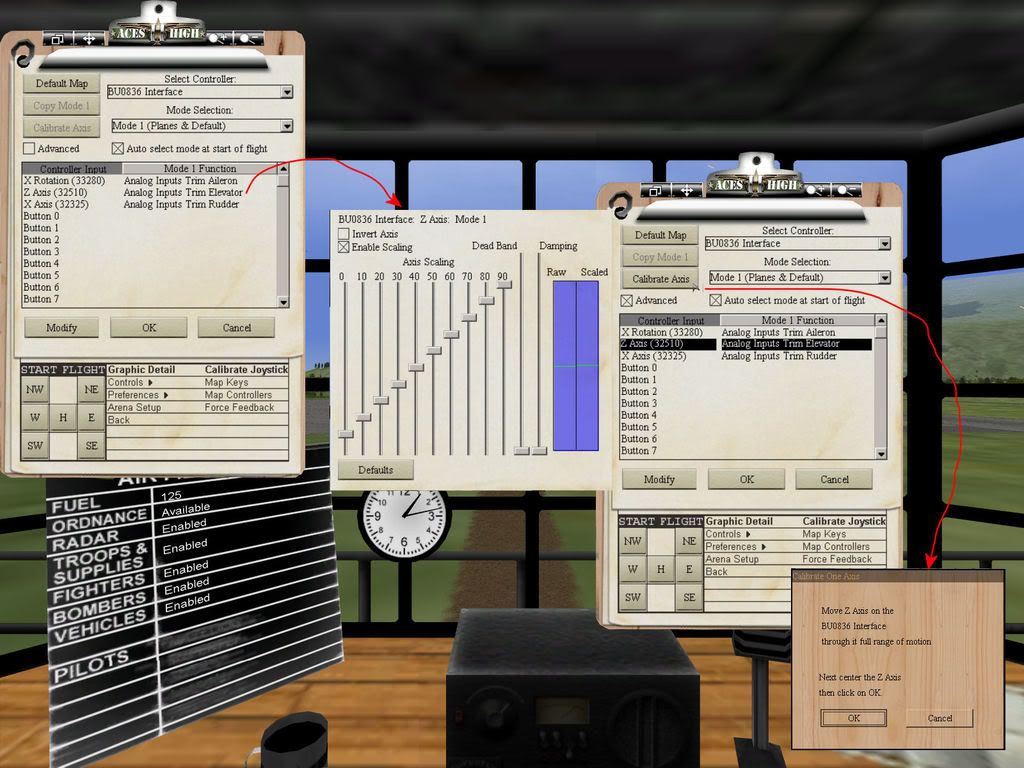
If you've done everything right, you should see the trim indicators move (albeit with a bit of delay) when you move your trim wheels while in the airplane. Though you can still use Combat Trim, you will find that it doesn't help you in the way it does with Button Trim. Try turning it on and off and you'll see what I mean.
If you find the trims to be too sensitive or not centering correctly, you need to go back to a calibration step or adjust your scaling. This setup should be done carefully else you will not get the fine control you desire. With care however and a bit of practice, you can get far more control over your airplane using analog trim than you ever can with button trim or combat trim.